Mobility – Strength – Skill
To maximize your potential, capacity and efficiency for Handstand Walks you must master it’s specific mobility, strength and skill demands: the three-headed monster every athlete must conquer. Let’s take on the monster one “head” at a time.
Mobility Requirements
The Handstand Walk is a midline movement. Therefore, there is only one key position requiring mobility:
1) ‘Stacked’ Overhead Position: ‘Stacked’ is defined as bone structural supporting load by joints being placed directly over one another. Think “when the arms bend the power ends.”
If you can’t effortlessly lockout your arms in line with your ears you are having to work against yourself in the Handstand Walk and expose yourself to injuries. If you cannot open up the shoulder fully you will never be able to hit an effortless Handstand Walk.
Here are a few of my favorite mobilizations to work on your overhead position:
• Kettlebell-Anchored T-Spine Stretch
• Elevated Cat Pose
• Banded Tricep Overhead Stretch
• Chest Stretch
Strength Requirements
In order to solidly hit the positions needed and be safe the following strength baselines are suggested:
1) Pushing: 2-3 Strict Handstand Push-ups [view video]
Any handstand (push-up / walk / static hold) is a pushing movement. Either you are pushing yourself up (in the handstand push-up) or you are resisting falling, which is pushing yourself up again. If you cannot do at least two or three strict handstand push-ups time invested in walking on your hands is a waste.
2) Overhead Stability & Stamina: 2-minute Static Hold against wall. [view video]
This is largely a test of midline stability, as well as pressing and shoulder stamina. This will be very challenging without a stacked position or without a strong lockout.
Skill Requirements
If you do not have all the Mobility and Strength requirements, time spent learning skill will be much less productive. Build the basics, then layer on top.
Stick to the basics and when you feel you’ve mastered them, it’s time to start all over again, begin anew, again with the basics, this time paying closer attention.”
There is no magic pill for mastering the Handstand Walk. You must consistently put in practice. As you do here is what to focus on…
Handstand Walk Focal Points
(1) The “Kick Up”
Be ultra-consistent with your kick up into the handstand. Drill the details. Foot placement, distance to hands touching, how quickly the feet come together, etc. The more consistent you can be the quicker you will learn the skill of being upside down and balanced.
(2) Find the Tipping Point
Once your feet come together and you have gotten inverted your must immediately feel your Center of Mass (CoM). Think about your CoM as your navel. If your navel is always directly over top of your hands you will not fall. As soon as your CoM shifts you must counter the movement or move your hands back under your CoM or you will fall. To layman’s terms, CoM can be referred to as the tipping point.
Movement Mistakes | Tipping Point [Too Little or Too Much]
Beginners to Handstand Walks often struggle to find the tipping point. That is, the point where a controlled lean or “fall” can help propel you forward during the walk. It is the same thing you do when running on your feet. Too large or too small of a kick up will result in missing the tipping point.
(3) Chase Your Heels
In the Handstand Walk the goal is to move. Essentially this means getting momentum going and then moving your hands to stop from falling. To get your momentum going you must move your CoM in front of your body. It is helpful to think about pushing your heels tall and out in front of the body. As your CoM shifts you will begin to build momentum and you will start moving your hands. Chase those heels.
(4) Mimic Lower Body Walking
Think about how ridiculous it would look if someone walked with locked out knees through their entire gait. The same thing goes for the upper body in the Handstand Walk.
Since for much of the ‘walk’ one hand is off the ground think about bending the elbow and pulling the hand through just like you do when walking upright.
Likewise, people don’t walk on their heels only. They balance using their full foot and their toes. Same applies to the hands. Don’t just use the palm…use all those fingers to balance too.
Often people ‘lose their midline’ when upside down. If you experience any degree of low back pain when Handstand Walking this one is for you. Often this is because the focus is pulled from thinking about quality movement to thinking about staying balanced. These things should be similar.
Something to focus on is squeezing your Butt & Gut…or if you prefer…Abs & Ass. Practice it just standing upright or inverted on a wall to feel the difference. Right away the structures above and below the low back fire and protect your spine. It will also improve your movement capacity when done correctly.
(5) Butt & Gut
Movement Mistakes | The “Scorpion” & Spreading the Legs
The most frequent ways that a lack of midline integrity (Butt & Gut) show up in the Handstand Walk is with the legs breaking forward or apart. Because your center of mass is higher during inverted walking, it places more demand on the midline. These mistakes are often tell-tale signs of mobility restrictions as well.
(6) Hand Orientation
Hand position is a bit of personal preference and matters less in the Handstand Walk than the Handstand Push-up or a Handstand Static Hold.
Think about how much you “toe-out” in a squat. Likely you have some play with the exact position, but you have a range that makes you feel comfortable, stable and mobile. The same is true for your hands in the Handstand Walk.
For people with poor wrist mobility, pointing hands out to the sides (90 degree relative to the wrist or 3 O’Clock and 9 O’Clock) can make the movement easier because they are able to lean over their thumbs.

For a static handstand hold you want your fingers pointed straight forward. This will be a needed skill when completing the 10-Step Progression of drills below. Splay your fingers and dig them into the ground.
Feel the relationship of tension between your fingers and the palm of your hand, and do a mental comparison to standing with the pressure and balance of your feet in relationship to your heel and your toes.
It is much easier to balance a bike than a unicycle. Use both your palms and your fingers.
When you go to walk on your hands, most athletes find it helpful to turn their hands out so their fingers are pointed laterally, especially those with immobile wrists.
The Handstand Push-up uses a 45 degree orientation because it allows the elbows to be pointed back, giving the athlete accessibility to the triceps and increasing overhead pressing strength.

Another help cue is to “Make Gecko Hands.” Basically, splay your fingers to cover as much surface areas as possible. This wider base of support allows for superior balance.
Some athletes with poor wrist mobility are forced to turn out their hands for all handstand variations. This is not conducive to creating a solid base of support, especially in static holds.
A similar movement fault is common in the lower body when an athlete turns out their feet (“Toes Out”) because he or she lacks ankle mobility. Here is my favorite stretch to improve wrist flexion…
A 10-Step Progression
What can I do to take my Handstand Walks from zero to hero?”
Each progression has a vertical video, which is optimized for mobile viewing. The reason for this is many athletes will bookmark this page and complete the progression when they are at the gym.
This progression is effective on two fronts.
One, it can help a beginner develop skill and strength over the course of weeks or months of practice so he or she can work toward being able to walk several five-foot “reps” unbroken.
And two, it can be useful to an advanced athlete to move through the drills rather quickly over the course of a few minutes to piece together a solid movement-specific warm-up.
You do not have to do every drill, especially once you have a feel for each one. If you find a few pieces that are super helpful and help you progress quicker because of them, I’ve done my job.
Step 1: L-Sit Plate Overhead Hold
What?
Sit on the ground with your legs straight and feet together. Set a bumper plate on your lap and sit tall (good posture). Lift the plate up over your head. Move your hands to the bottom of the plate so your palm are in contact and you are unable to grip the plate. Find the balance point where the plate is flat and your core and shoulder are stable. Do not allow yourself to lean backwards, opening up your shoulders. Continue to pull open the shoulder open.
Why?
This is an accessible way (I won’t call it easy) to help an athlete find their midline. Without strong and mobile quads, hips, t-spine, lats and shoulders this position will be extremely challenging even with light weight.
Step 2: Hollow & Arch Holds
What?
For the hollow hold, lay on the ground and activate your abs to lift your shoulders and back off the ground, as well as your legs. Only the small of your back and your glutes should be in contact with the ground. For the arch hold, roll over to your stomach. Squeeze your butt, back and shoulders to lift everything except your stomach off the ground. You can play around with doing static holds or generating a controlled rock, like video below demonstrates.
Why?
Many athletes, even very fit ones, struggle to make fundamental shapes. Being able to create long lines without any kinks or bends is key to gymnastic success. The best way to each this, in my experience, is going to the ground. Moving to the ground moves you horizontally and changes the way gravity acts on your limbs. Those who can create and maintain ‘pretty’ lines on the ground will find gymnastics movements on the bar much easier.
Here is variation of a plank (Inchworm Planks) that works the midline in a similar yet novel way. Walking your hands above your head greatly increases the difficulty of the drill.
Step 3: Wall Drills
What?
Time to take to the wall. The wall is your best friend while learning to Handstand Walk, complete Handstand Push-ups or execute Handstand Static Holds. There are five sub-skills within Step 3, each progressing in difficulty. All are facing the wall.
Why?
Unlike the learning process for Handstand Push-Ups, the athlete faces the wall for learning Handstand Static Holds and Handstand Walks. Facing the wall encourages core and abdominal engagement, where facing away from the wall encourages arching (break in midline) at the lower back. As you do each of these drills think about pressing into the floor, drawing your rib cage down by engaging your abs and pulling your shoulders and upper back open. Train yourself to open fully through the t-spine and shoulders to find a ‘stacked’ position rather than having a slightly closed down shoulder and arching through the lower back (see image below). It’s not just about orthopedic safety and longevity; it’s about efficiency and the ability to breathe, brace and move.

Sub-skill 1: Wall Walks
Why?
The Wall Walk is foremost a means of getting into a handstand facing the wall. It is an incredibly tool for building strength and stamina (try programming it into a workout) while also learning how to move the hips to shift one’s body weight. In order to lift one hand, you must shift most of your weight to the other. Learning how to manipulate the body while keeping arms locked out strong is key component of the Handstand Walk. As you are first learning you will struggle to get close to the wall, and as comfortability increases you will be able to get your nose to touch the wall.
Sub-skill 2: Static Hold
Why?
The static hold isn’t trying to balance and come off the wall (sub-skill 5), rather it is propping yourself against the wall and stacking your joints. This means the requirement to find the balance / tipping point is low, but the requirements for your musculature to find stability and control very real. Abs on, shoulders open.
Also, remember to point those hands forward and dig in with those fingers (see image above for reminder).
Sub-skill 3: Weight Shifts
Why?
Start off just learning to shift your weight and and as comfortability increases add a bit of elevation using bumper plates of increasing thicknesses. Just like the wall walk, weight shifts are more about learning how to manipulate your body weight and momentum in space than building musculature or mobility yet both aspects will benefit.
Sub-skill 4: Shoulder Taps
Why?
This is about a complete weight shift and hold (i.e. side-to-side balance). When balancing on a single arm you must shift that direction so the support aligns with the midline. Start with hands further from the wall (more horizontal) and as comfortability and skill increases, continue to move closer until the hands are very close to the wall and the body is vertical.
Sub-skill 5: Toggling to Freestanding
Why?
The final sub-skill starts with the static hold with nose and toes in contact with the wall. Feel the balance in your fingers and the base of your palms. Begin to subtly push your body away from the wall, so you are suspended for fractions of a second in a static freestanding handstand. Over time work to increase how long you can hold without touching the wall. When first starting, you will under or overcompensate, not getting off or falling away from the wall. Do this drill in an open space so you can turn out and catch yourself when you fail without hitting anything.
Step 4: Banded-Rig Balance Drill
What?
This is just like the Toggle of the Wall drill, but it is a more dynamic environment which mimics the actual movement closer. The lighter the band you use the harder it will be to balance. Start with a heavy band and put it high on the rig so it hit your calves. Make sure to place your hands as close as possible to directly under the band so you hit vertical. If you kick up to fast or too slow and can’t find the balance point, you will get rejected by the band.
Why?
This drill builds consistency with kick-ups along with balance using the fingers. You must be confident and taunt through the midline while simultaneously mastering a soft, relaxed focus directed toward the fingers and balance point.
Or my personal favorite variation…
Step 5: Freestanding Kick-Ups
What?
Kick up with the aid of the wall attempting to hold a freestanding handstand for a few seconds. When you lose your balance try to retrace your kick up in reverse. The more symmetrical and consistent you can make the kick up and kick down each rep will help your holds and walks. Learn to feel the balance in your fingers.
Why?
Just like the last one, this drill builds consistency with kick-ups along with balance using the fingers. It is more difficult than when you have the band for assistance.
Step 6: Freestanding Balance Drill
What?
Kick up and maintain balance as long as possible in a limited space. I tell my athletes to stay in the same 4×6 mat. The goal is maintain balance.
Why?
To clarify the end goal for this guide is not to master a freestanding handstand, it is to master Handstand Walks as it appears in Functional Fitness testing scenarios (i.e. Handstand Walks for X Distance, sometimes including obstacles.) Therefore, rather than trying to stay in perfectly the same place and not moving the hands, it is okay to move around within a mat, but work to stay inside of that box.
Step 7: HSW Attempts
(Max Unbroken – Adding Distance)
What?
Walk on your hands as far as possible. Only attempt when you are fully recovered. Respiratory, cardiac or muscular fatigue are factors that come into play in Step 9. Do not move to Step 8 until you can do 50’ Unbroken on any given day. This step can take months: accept this to avoid frustration and maximize your child-like learning potential.
Why?
You have all the tools needed to learn Handstand Walks much quicker than if you skipped straight to this step.
Step 8: Speed HSW
What?
Walk on your hands as fast as possible without losing your balance. I recommend doing an EMOM of 25’ Unbroken sections. Do not move to Step 9 until you can do a 10 minute EMOM of 25’ Handstands all in 10s or less.
Why?
Speed and quality of movement should always precede fatigued settings. An athlete who can clean and jerk 385 lb will be able to do “Grace” in less than 1:30, while an athlete who can do a sub 90s “Grace” might take years to develop a 385 lb Clean & Jerk.
Step 9: Fatigued HSW
What?
Throw Handstand Walking into your Met-Cons, Intervals and EMOM work with the presence of other movements. Work to test the limitations of your skill with respect to your position, movement and breathing. This is best achieved by unique combinations of movements, time domain and Handstand Walking distances.
Why?
Because this is how Handstand Walking is tested in the sport of Functional Fitness. You signed up for this.
Listen: The King | Movement Density [The Fitness Movement podcast #001]
Step 10: HSW Obstacles
What?
Per the 2017 CrossFit® Invitational, 2018 Regionals and 2018 Games Handstand Obstacle courses have been a significant separator for the competitive field.
This is the final step because most athletes who have competitive aspirations within CrossFit should spend their training hours on other weaknesses that will allow them to get to the Competitions that use obstacles in their tests.
If you have never been to a Semifinal Event because of other limiters, you are better off spending your time there. Unless of course, you simply enjoy training and maximizing the ability to walk on your hands. If so…by all means…
Why?
Because this is how Handstand Walking is tested in the top tier of CrossFit competitors.
Top Accessory Exercises
What are the best exercises to build strength for Handstand Walks?”
Lockout (Maintaining stacked, static pressing)
• L-Sit Plate Overhead Hold
• Wall-Facing Handstand Hold
• Push Jerks
• Overhead Yoke Carry (also a great midline exercise)
• Overhead Carries, Dumbbells or Kettlebells (also a great midline exercise)
• Strict Handstand Push-Ups (also a great midline exercise)
Midline (Prevention of sagging or overarching)
• Plank Variations
• FLR Hold
• Inchworm Planks
• Hollow & Arch Hold + Rocks
• L-Sit Raises (or) L-Sit Holds
• Tuck Holds
• Hanging Leg Raises (or) Strict Toes-to-Bar
Gymnastics Density for the Big Five (12-Week Program)
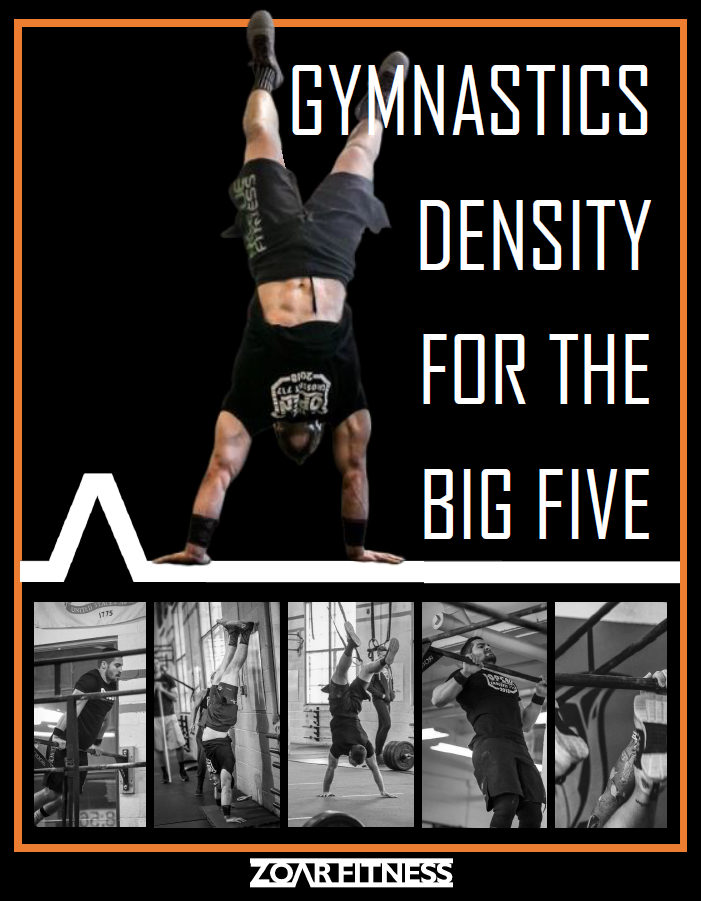
Are your gymnastics movements holding you back from reaching your potential?
Statistics show five movements are far and away the most likely to show up in local competitions and online qualifiers like the Open. That’s why this program focuses on improving “The Big Five.”
1) Muscle-Ups (Bar & Ring)
2) Handstand Push-Ups
3) Handstand Walks
4) Toes-to-Bar
5) Chest-to-Bar
If your capacity in these movements is holding you back from taking your fitness to the next level, this program is for you!
Related: Evaluating Readiness to Train & Fatigue Indicators
Also in the Movement Library: Handstand Push-Ups

